Video Demonstration
See the Method in Action
YouTube Video
Helium Sniffer Method
Video demonstration of the helium sniffer probe method for locating leaks on pressurized workpieces with a helium mass spectrometer leak detector.
Open on YouTubeResource Topic
A practical explanation of helium sniffer probe testing for locating leaks on pressurized workpieces with a helium mass spectrometer leak detector.
1 Video
Video Demonstration
YouTube Video
Video demonstration of the helium sniffer probe method for locating leaks on pressurized workpieces with a helium mass spectrometer leak detector.
Open on YouTube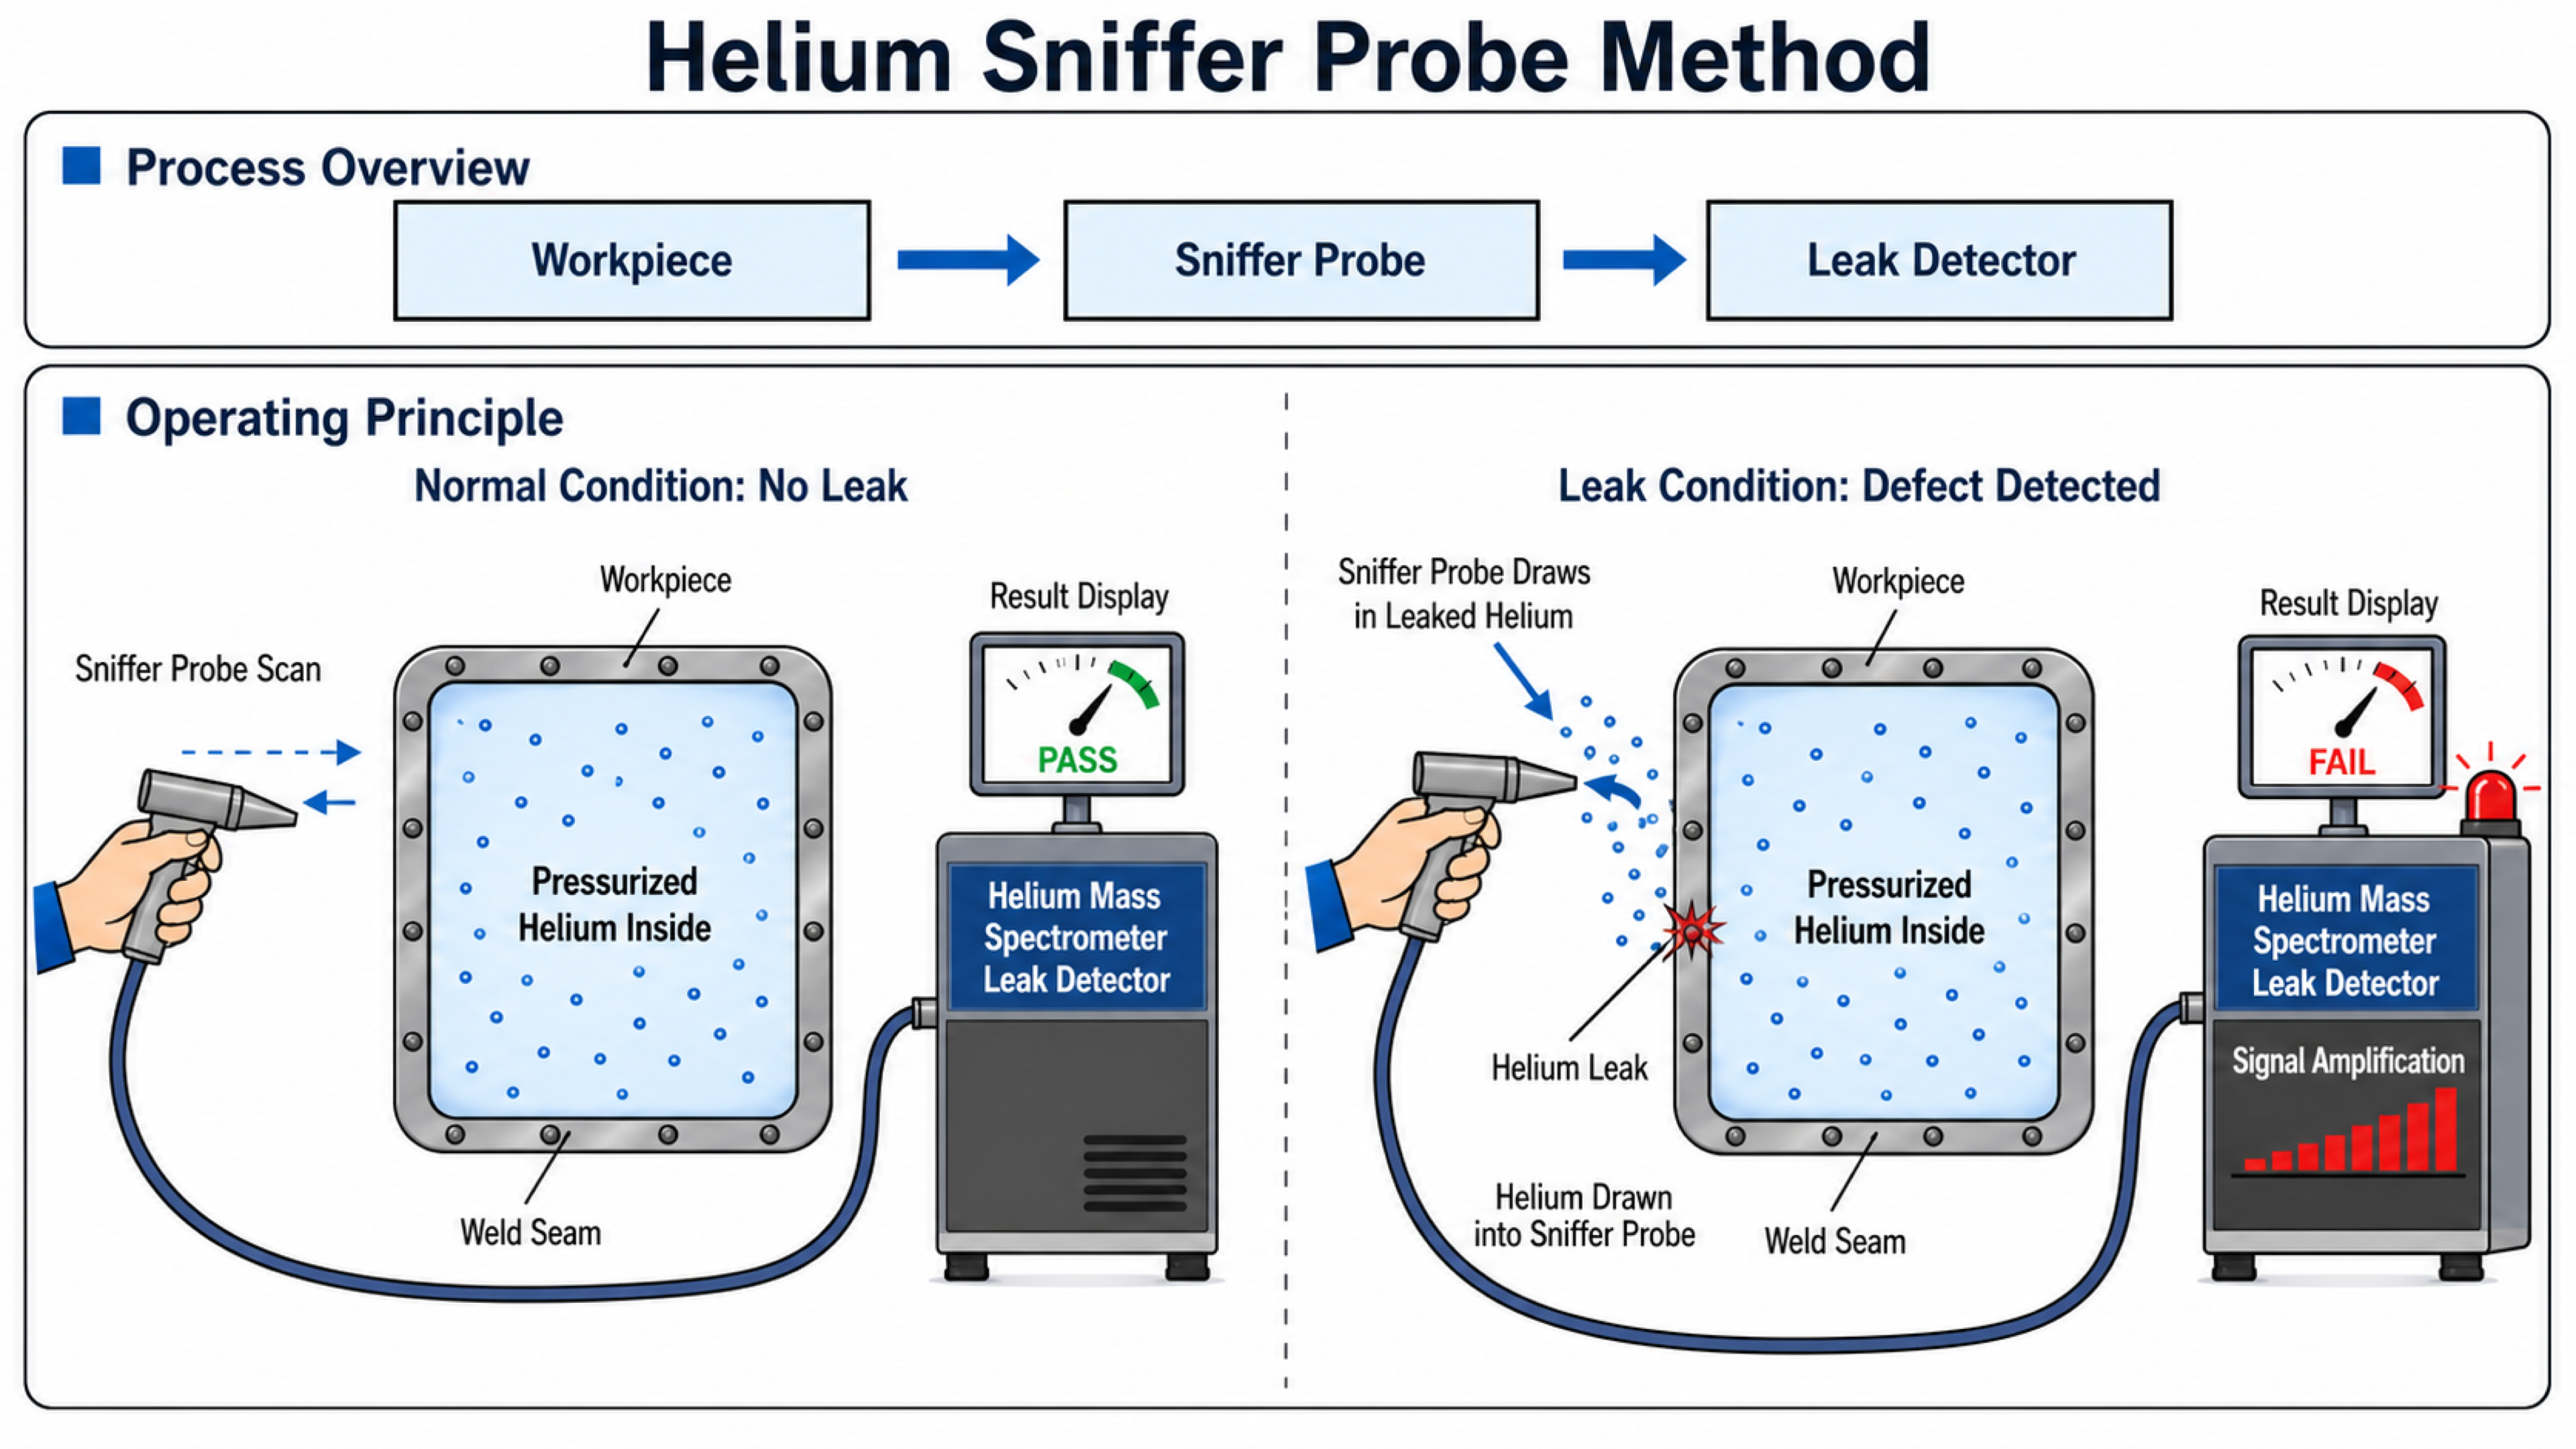
The helium sniffer probe method is a pressure-side tracer gas technique for finding where helium escapes from a part. The workpiece is pressurized with helium or a helium-containing test gas, and an operator moves the sniffer probe along welds, joints, seals, ports, and suspected leak paths. If helium exits through a defect, the probe draws that local gas sample into the helium mass spectrometer leak detector.
This method is direct and practical: it does not require a vacuum chamber, and it gives repair teams a physical location to inspect. Its measurement quality depends on probe handling, background helium control, airflow, part pressure, and the geometry of the leak path, so a disciplined scan sequence matters as much as the instrument itself.
Method selection
Use sniffer probe testing when the product can be safely pressurized but cannot be evacuated, cannot fit into a chamber, or needs field-friendly leak localization after assembly, repair, or service. It is especially useful for weld seams, brazed joints, flange faces, threaded connections, tube joints, valve blocks, manifolds, and sealed enclosures.
The method is designed to locate a leak point. If the production requirement is a highly repeatable total leak-rate measurement, vacuum chamber testing or another integral method is usually the stronger final acceptance process. Sniffer testing remains valuable as a diagnostic and repair-confirmation method because it tells the operator where to act.
The part is tested from the outside while helium is inside the workpiece, making the method useful for pressure-rated assemblies and field checks.
The probe can be moved around suspected points so the operator can narrow the leak to a weld, joint, seal, port, or connection.
Probe distance, angle, scan speed, nozzle geometry, suction capacity, ambient helium, and ventilation all affect the displayed signal.
After a leak is found and repaired, the same scan sequence can be repeated to confirm that the response has disappeared.
Operating principle
The workpiece is first charged with helium or a helium mixture to the approved test pressure. Under normal conditions, helium remains inside the sealed volume and the detector display stays below the reject threshold. If a defect is open, helium escapes from the pressurized side into the surrounding air.
The sniffer probe creates a controlled sample flow at the probe tip. When the tip passes near the escaping helium plume, the sample is transported through the sniffer line to the helium mass spectrometer leak detector. The detector separates helium from the gas stream, amplifies the signal, and presents a leak-rate indication, concentration response, audio alarm, or pass/fail result.
Workflow
Verify that the workpiece, seals, tooling, and safety controls can withstand the planned positive pressure before helium filling begins.
For initial testing, avoid immediately filling with high-concentration or high-pressure helium. A large leak can release a large amount of helium, waste gas, contaminate the area, and make small-leak inspection unstable.
Fill the workpiece with helium or a helium mixture, allow the system to stabilize, and confirm the ambient helium background is low enough for the required threshold.
Move the probe slowly around suspected leak locations. Use a consistent order, typically from lower areas to upper areas and from far positions toward near positions.
When the detector indicates helium, reduce probe speed and distance, then scan the nearby area repeatedly to locate the strongest and most repeatable response.
After testing, recover helium when the process supports it or exhaust it safely outdoors. Ventilate the test area, repair the leak, and repeat the same scan route.
Sensitivity
Sniffer mode is useful for leak localization, but it is less accurate and less sensitive than vacuum-mode helium testing because the escaping helium is diluted by ambient air before the probe samples it. The signal is therefore influenced by both the leak itself and the way the probe is moved.
The referenced Wayeal training material lists a minimum detectable leak rate of 2.5 × 10^-9 Pa·m³/s for sniffer mode and 5 × 10^-13 Pa·m³/s for vacuum mode. The practical gap comes from sample dilution, background helium, airflow, probe distance, and operator-dependent scanning.
Precautions
Applications
Condensers, evaporators, compressors, refrigerant lines, valves, brazed joints, and service repair points.
Cooling plates, manifolds, battery trays, heat exchangers, welded housings, and pressure-side fluid circuits.
Gas-insulated tanks, switchgear components, welded enclosures, sealed poles, fittings, and connection interfaces.
Field inspections, rebuild stations, repaired seams, final assembly joints, and fixture or adapter checks.
Wayeal support
A reliable sniffer process is built from more than the detector. Wayeal can help define the helium concentration, fill pressure, probe type, scan route, reject threshold, calibration routine, ventilation approach, and operator training plan around the actual workpiece.
For a new application, the useful starting information is the part material, internal volume, maximum allowable pressure, expected leak locations, target leak rate, available helium handling method, cycle time, and whether the process will be manual, semi-automatic, or robot-assisted.
Share your workpiece drawings, pressure limit, target leak rate, suspected leak locations, and current test process. Wayeal can help choose between sniffer probe testing, helium spray testing, vacuum chamber testing, and integrated production leak detection.
Discuss Your ApplicationShare your part size, material, target leak rate, cycle time, and production workflow. Wayeal will recommend a professional helium leak detection configuration for your application.